Setting up email seems like an easy task these days, however, with so many apps and security concerns, things get a little bit more complicated.
At SearchEngineOp we have set up this articles to help you install your email accounts on different programs. This time, iPads.
Before setting up your email, you need to have
First time setting up email on an iPad
- Tap ‘Settings’ on the home page

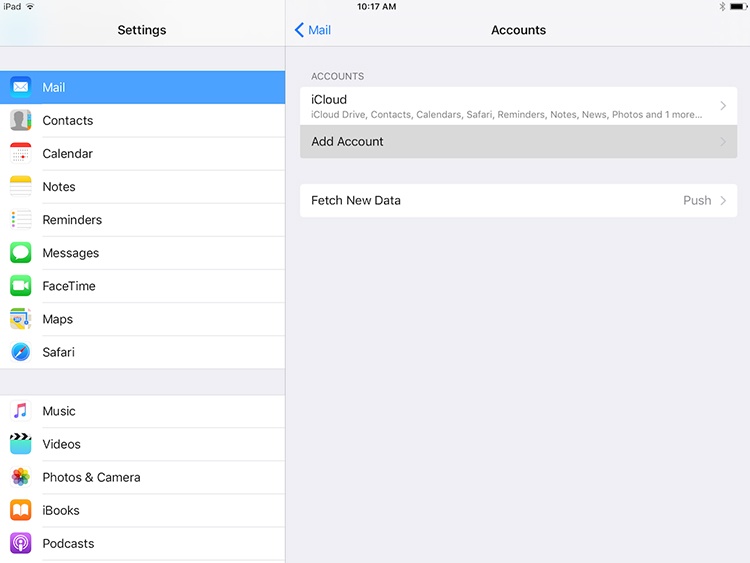
- Tap Mail, then Add Account. If you have previously added accounts, tap Mail -> Accounts -> Add Account
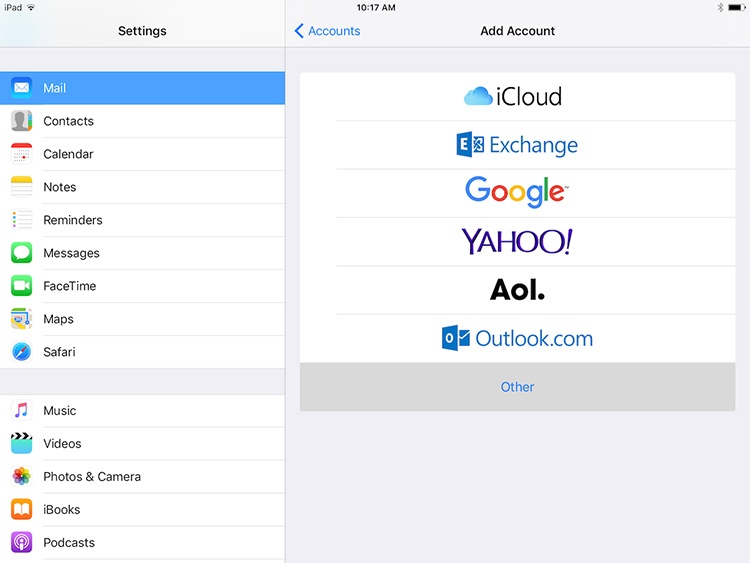
- Choose/Tap Other
- Next step is to tap Add Mail Account.
- In the Name field enter the name that will appear on the messages you send (other people will see this name).
Enter username@example.com in the Email field (replace username@example.com with your full email address).
In the Password field enter the password for your email account (make sure to type it right).
In the Description field you need to add a short description of your account in your email client. This name would show up only in your own mail program. You can set a name such as “Work Account”, “Personal mail” or your own name, for example.
Click Next when done.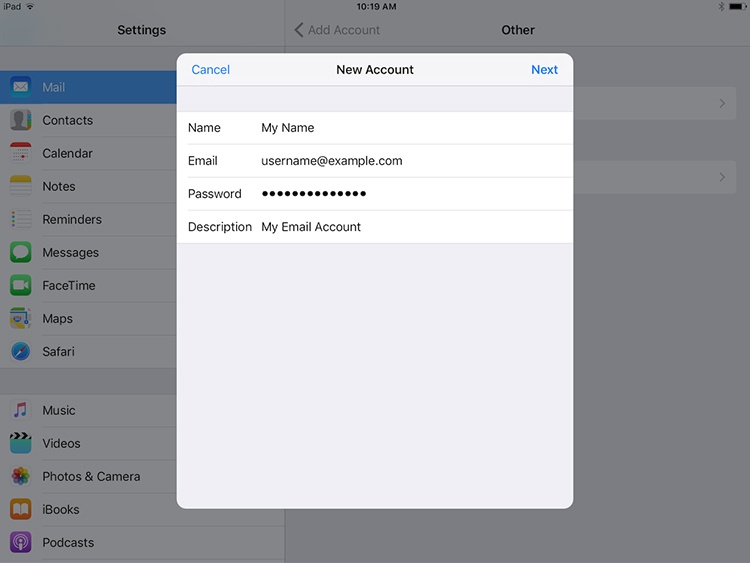
- Next up, tap IMAP. For Host Name in the Incoming Mail Server use the incoming mail server provided to you.
Enter username@example.com in the User name field (it is important to use your full email address, check for typos).
The Password field should be filled in for you from the previous screen, if not, type it again.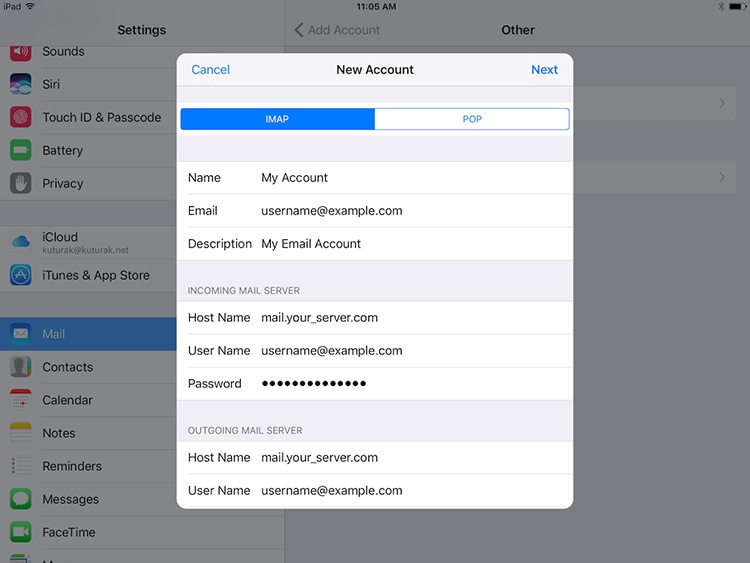
- Scroll to the Outgoing Mail Server section and tap the Host Name field and type in outgoing mail server.
Enter username@example.com in the User Name field (it is important to use your full email address, check for typos).
In the Password field enter the current password for this particular mailbox. When you are done, tap the Next button at the top of the screen.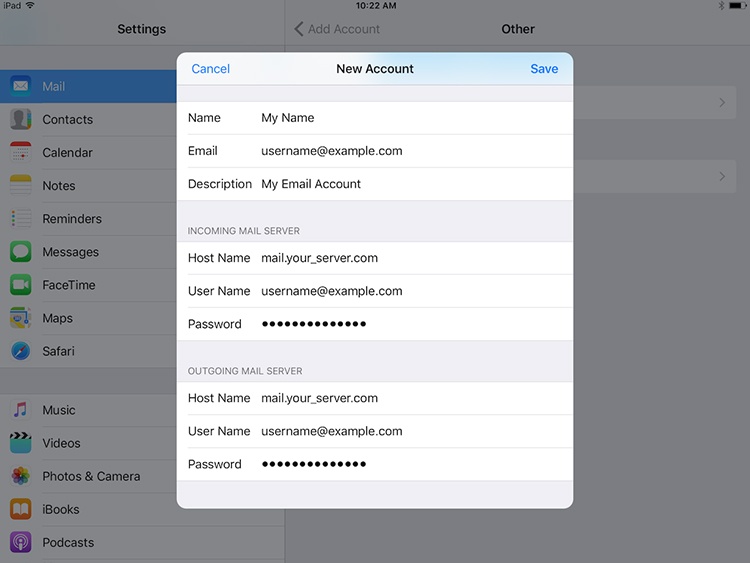
- If you have an active Internet connection, the device will try to verify your settings by connecting to the server. If it fails, check for typos, especially in your password.
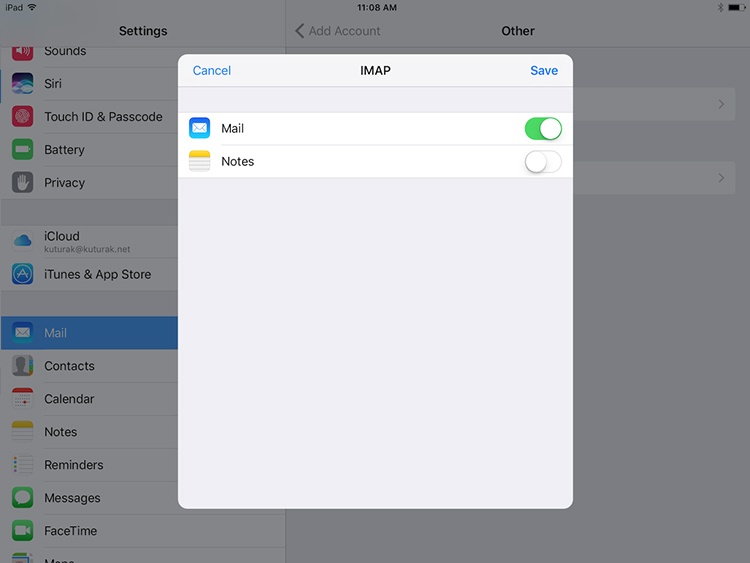
- If the test is successful, your device will show the IMAP screen. Make sure Mail is set to ON and Notes to OFF. Tap the Save button.
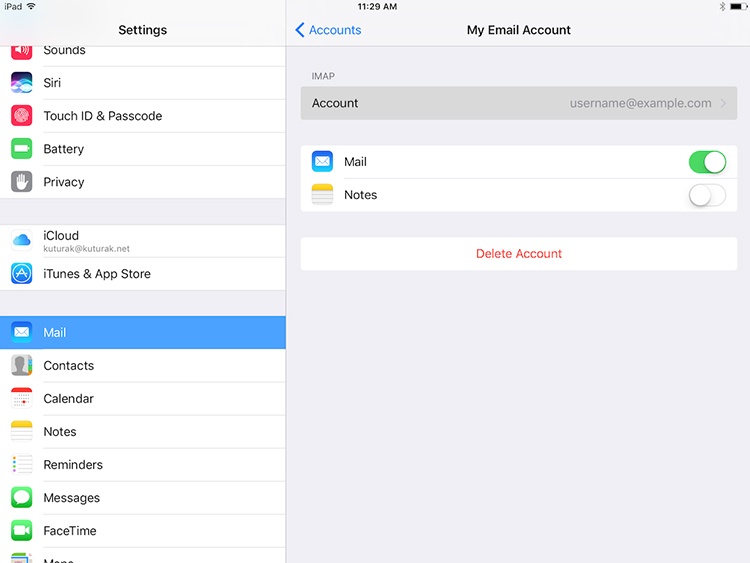
- Tap your newly added account under Accounts.
- Tap on your account on the next screen as well (under the IMAP section).
- Tap Advanced.
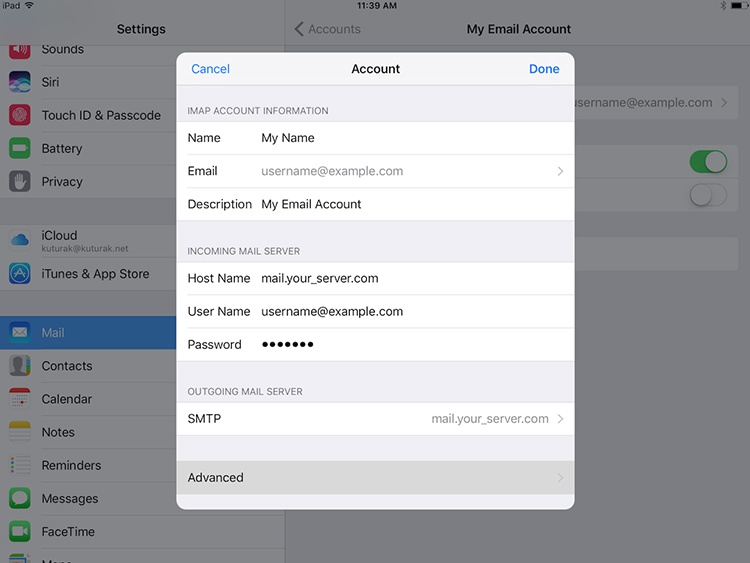
- Make sure that Use SSL is set to ON, and that the Server Port is 993.
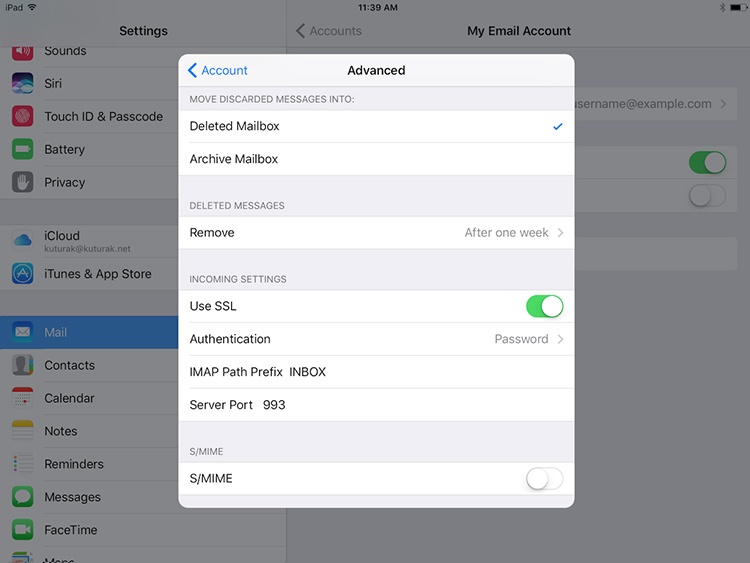
This procedure should work for iphone, ipad and ipod. You can also add additional email accounts by repeating the same steps.

 Ads & Digital Marketing
 Website Design
 eCommerce Websites